> ## Documentation Index
> Fetch the complete documentation index at: https://docs.cobrix.co/llms.txt
> Use this file to discover all available pages before exploring further.
# Crear un cliente nuevo en Cobrix
> Registra un cliente, define su estado inicial y asigna el plan que corresponde.
Esta guia explica como crear un cliente desde Cobrix y elegir el flujo correcto si es un cliente nuevo o un cliente migrado desde otro sistema.
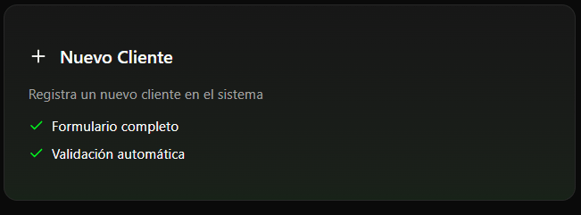
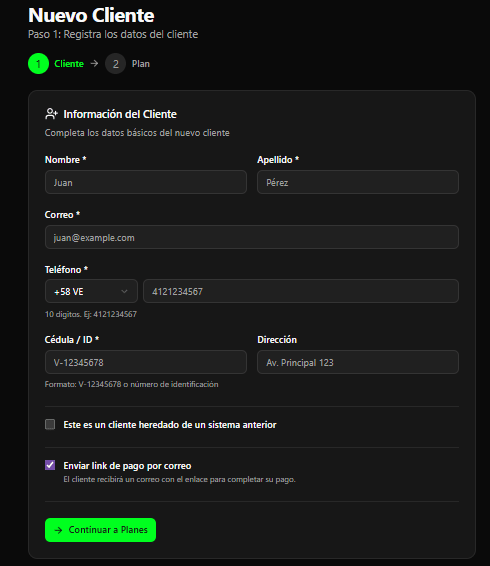
En el menu principal, entra a **Nuevo Cliente** para abrir el formulario de registro inicial.
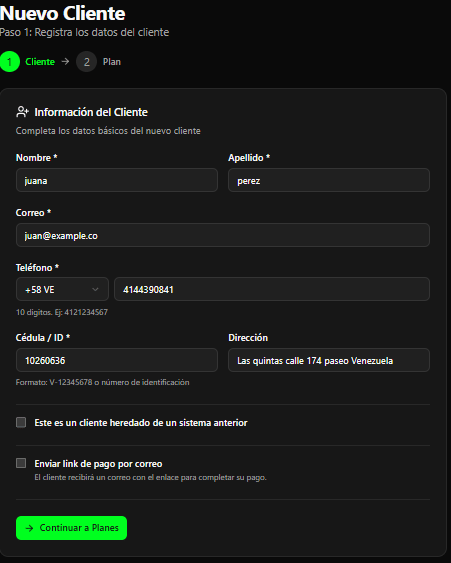
 Ingresa nombre y apellido, correo electronico, numero de telefono, identificacion y direccion. Verifica estos datos antes de continuar porque se usan para enviar links, recibos y comunicaciones de cobro.
 Si el cliente no viene de un sistema anterior y todavia no corresponde cobrarle, no actives los selectores adicionales.
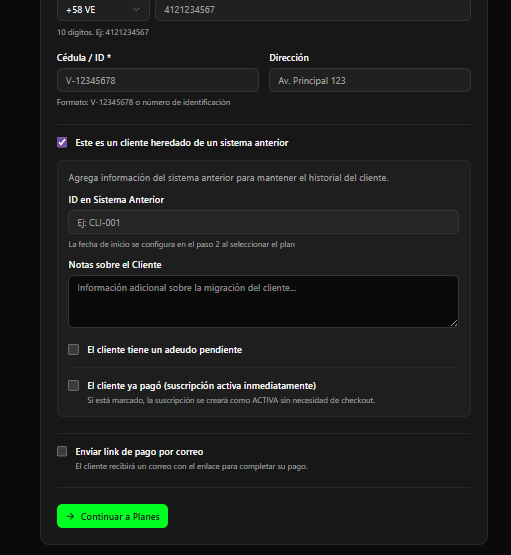
Si el cliente ya existia en otra plataforma, activa **Este cliente es heredado del sistema anterior** y completa el ID anterior y las notas necesarias.
Si el cliente no viene de un sistema anterior y todavia no corresponde cobrarle, no actives los selectores adicionales.
Si el cliente ya existia en otra plataforma, activa **Este cliente es heredado del sistema anterior** y completa el ID anterior y las notas necesarias.
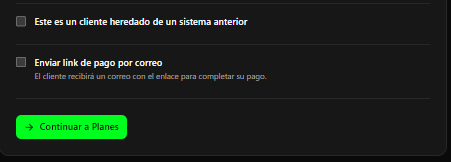 Para cobrar el primer ciclo de inmediato, deja desactivado el estado heredado y activa **Enviar link de pago**. Si marcas que el cliente ya pago, Cobrix no enviara el link inicial.
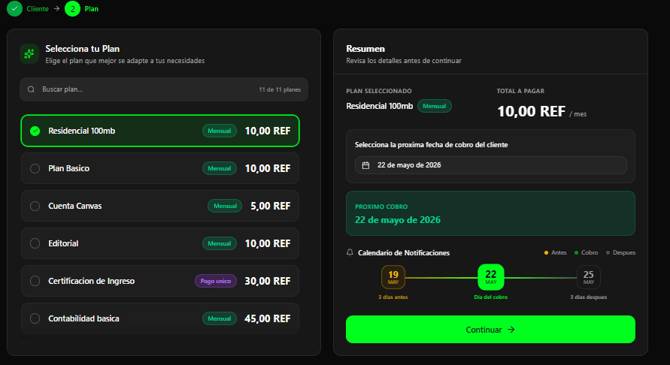
 Haz clic en **Continuar a planes**, selecciona el plan que corresponde y revisa que la fecha de cobranza sea correcta.
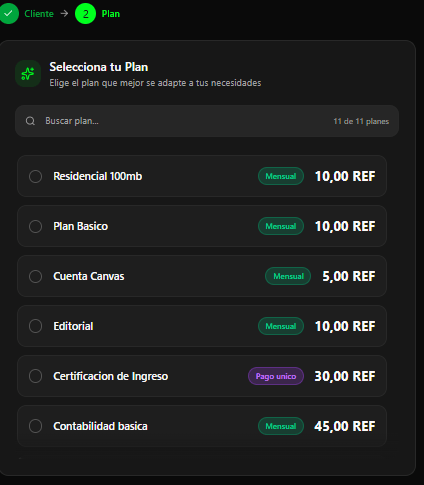 Confirma el plan y la fecha. Si activaste **Enviar link de pago**, Cobrix generara la orden y la enviara al WhatsApp del cliente.
 Revisa los datos de contacto antes de guardar. Un correo o telefono incorrecto puede impedir que el cliente reciba su link de pago o sus recibos.
## Para LLMs
Revisa los datos de contacto antes de guardar. Un correo o telefono incorrecto puede impedir que el cliente reciba su link de pago o sus recibos.
## Para LLMs